Of course, every gardener knows that the correctness of the planting procedure of a plant affects its further development, and cherries are no exception. There are several rules that you need to familiarize yourself with in order to successfully plant and ensure the best conditions for cherry to grow.
Cherry growing conditions
Cherry is successfully grown in all climatic zones (the exception is the columnar cherry - it is recommended to grow it only in the southern regions and in the central regions), but this culture is demanding on conditions, so before planting the cherry, you need to choose the most suitable site and prepare it correctly his.
Basic site requirements
Location Cherry is best planted in an open, well-lit area (try to choose the south or west side). It should also be sufficiently blown, but if possible protected from the cold north wind. Some gardeners quite allow the placement of cherries near the wall of the house or a fence, since in these places a lot of snow accumulates in winter, which helps protect the root system from freezing. The minimum distance is 1 m, but if you rely on established standards, then the distance to the fence is 2 m, to the walls of the house - 1.5 m.
The soil. In the selected area, the soil should be sandy, sandy loam or loamy. If you do not know what type of soil your site belongs to, then check out their brief description.
Sandy soil. The composition of such soil is dominated by sand. This type of soil is characterized by friability and friability, and also passes water well. But you need to remember that such soil needs regular fertilizing (usually compost or humus is used for this purpose at the rate of 20 kg per 1 m2).

Sandy soil needs regular enrichment
Sandy loamy soil. It is a mixture of sand and clay, well forms lumps. The color of such soil is usually light brown. Measures to maintain fertility: mulching, sowing green manure, the introduction of organic matter (3-4 kg / m2) plus top dressing.

Sandy loamy soil is well treated
Loamy soil. Clay predominates in the composition, so the soil has the usual dark color. From it you can form a sausage that will fall apart when you try to make a ring. Fertility measures: the same.

Loamy soil suitable for growing any crop
It is strongly not recommended to grow cherries in the shade and on swampy soils.
Acidity. It is recommended to plant cherries on neutral soils, so check their acidity in your chosen area. If the ground is covered with light bloom, moss or horsetails grow well on it, and the pits are filled with rusty water, this indicates a high level of acidity. To reduce it, add slaked lime (250-350 g / m2), ash (250-450 g / m2) or dolomite flour (300-500 g / m2).
Groundwater. Must lie at a depth of not less than 1.5 m from the surface. If the groundwater is close, then make an earth embankment with a thickness of 0.8 m to plant a cherry.
Neighbors. Gardeners claim that the best neighbors for cherries are cherries (it can be planted at a distance of 6-8 m), plum (the distance to the cherry is 4-6 m), honeysuckle (it can be located at a distance of 1.5 - 2 m).
It is undesirable to plant cherries next to:
- Apple and pear, as they will take away beneficial substances from cherries;
- Raspberries (she suffers from the same diseases as cherries);
- Gooseberries (it can harm the root system of cherries);
- currant (cherry soil does not fit). The distance between cherries and these crops should be at least 10 m.
Also, do not place cherries next to solanaceous plants (tomatoes, eggplants, peppers) and blackberries (it forms dense prickly thickets) - there should be at least 1.5 m between cherries and these crops. Of the non-fruit crops, oak, birch, linden, poplar and some conifers (spruce, pine), so try to plant a seedling 10 - 15 m from these trees.
Site preparation
If you want to plant cherries in the fall, then you need to prepare in the spring, if in the spring, then in the fall. To do this, along with digging, add 10 kg of compost or humus, 100 g of superphosphate and 100 g of potassium salt per square meter to the soil. After 3-5 days, apply deoxidizing material if necessary.
Landing time
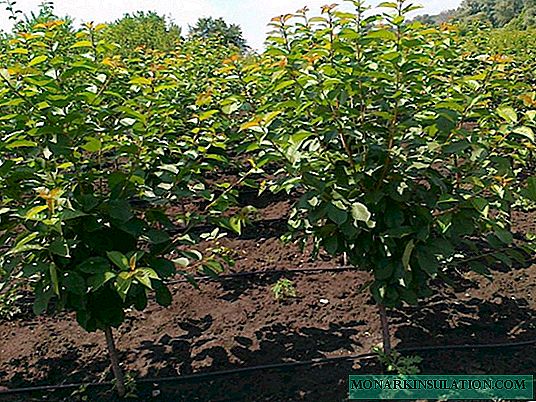
- In the middle zone and colder regions, it is recommended to plant cherries in early spring (early to mid-April), when the snow melts and the soil dries out a little and warms up, but before the buds swell. If you procured a seedling in the fall, it is recommended to dig it before spring. This is done like this: dig a trench 40-50 cm deep and place a seedling in it at an angle of 30about so that the crown is facing south, then cover the ground with roots and boles until the first lateral branch. Tamp the ground and water, cover the crown with a spruce branches. The instillation of seedlings is best done in the period from mid to late September, until frost sets in.
- a photo

If you plant seedlings, they will be well preserved until spring
- In the warm southern regions, cherries can also be planted in the fall in the period from mid-September to the end of October, about a month before the onset of frost.

Planting cherry seedlings in the ground
Planting technology is the same for different types of cherries and can be used in any region.
Landing pit preparation
Typically, the pit is prepared 2-3 weeks before planting. The technology is as follows:
- In the prepared soil, dig a hole 80 cm wide and 50 cm deep. Put the upper fertile layer (20-30 cm) to the side.
- Place a long (1.2-1.5 m) peg in the center of the pit to secure the seedling after planting.
- Prepare the following mixture: humus or compost (10 kg) + superphosphate (200 - 300 g) + potassium salt (50 g) or ash (500 g) + removed humus. If the clay soil is on your site (it has a reddish-brown hue and sticks strongly to shoes after rain), add 10-15 kg of sand.
- Pour the substrate into the pit with the slide so that the top of the slide is at the edge level.
- Leave excess substrate at the edges of the pit.
If you want to plant dwarfish cherries, the composition of the fertilizer will be as follows: compost (7 kg) + superphosphate (35 g) + potassium chloride (20 g) + ash (100-200 g).
Planting cherry seedlings
- Prepare the seedling for planting. To do this, pre-soak the dried roots for 3 to 4 hours in warm water. If the roots are damaged, then it is necessary to cut them to a healthy place, and then soak them.
- After soaking, plant the seedling in the ground next to the peg on the north side, spread the roots. Fill them with soil residues so that the root neck (the place where the stem goes to the root, as a rule, gardeners are guided by the first large root branch) remains on the surface. Gently compact the soil.
- Make a hole around the seedling with a diameter of 20 cm, pouring a small earthen shaft 10 cm high at the edges. Tie the seedling to the peg with the “eight” without pulling the trunk.
- Pour 15-20 liters of warm water into the well. If after watering the root neck is exposed, sprinkle it with earth.
- Mulch the hole with humus, peat or sawdust with a layer of 3-5 cm.

With proper planting of cherries, the root neck is above the surface of the soil
Planting cherries - video
Placement of different types of cherries when planting
The main difference in planting cherries of different types is to place them from each other at different distances. Also, when preparing the site, consider the characteristics of the variety. If you want to plant a self-infertile cherry (it will not produce crops without pollinating flowers of pollen of another cherry variety), and there are no other cherry trees nearby, then for best fruiting you will have to purchase at least 1 other seedling of another variety (experts recommend not planting in this case less than 4 different-grade seedlings). If you want to plant a large number of seedlings, then when planting them, it is better to place them in a checkerboard pattern.
| Kind of cherry | Distance between trees |
| Tree-like | The distance between rows - 3 m, between plants in a row - 3 - 3.5 m |
| Bushy | The distance between rows - 2 - 2.5 m, between plants in a row - 2.5 m |
| Felt | The distance between rows - 2 - 2.5 m, between plants in a row - 3 m |
| Columnar | The distance between rows - 2 m, between plants in a row - 2.5 m |
| Dwarf | The distance between rows - 1.5 - 2 m, between plants in a row - 2 m |
Propagation of cherries in other ways
If cherry is already growing on your site, then you can increase the number of plantings of this crop without resorting to buying a seedling.
Propagation of cherries by root shoots

For the propagation of cherries by root shoots, you need to choose the most viable shoots
Like many other fruit crops, cherries form basal shoots, and with its help you can propagate your plant. It is best to carry out the procedure in early to mid-April, before budding, (in the southern regions - at the end of September) on a cloudy day.
- Choose a tree that produces fewer overgrowths than others.
- Choose the most viable seedlings no older than two years, located from the main tree at a distance of more than 1 m.
- Dig out the ground near the bush at a distance of 20 cm and chop off the root connecting the shoot to the mother plant.
- Cut the shoot 1/3 and remove the side branches. Water as needed. Spend 2 top dressings with superphosphate (1 tbsp. Diluted in 10 liters of water): the first immediately after separation from the main tree, the second - at the end of June.
Next year, at about the same time, dig up a seedling and transplant it to a previously prepared permanent place.
Cherry propagation by horizontal layering

Horizontal layering allows you to get many new seedlings
It is carried out from the beginning to the middle of April. It is well suited for propagation of felt cherries or cherries on a low stem, but can be used for ordinary crops provided that the branches are long enough.
- Take a horizontal branch, if possible shorten it by 1/4 and lay it on the ground (it is advisable to dig a trench 5-7 cm deep).
- Secure the branch with wire.
- As soon as the shoots begin to sprout on the branch, then cover it with soil and water it well.
Water as needed. Next year, separate the sprouted shoots and transplant to a prepared permanent place.
Propagation of cherries by vertical layering

When propagating cherries with vertical layers, the shoots need constant hilling
This procedure also needs to be carried out during the rest period. Often carried out on damaged trees.
- Trim the seedling or cut the adult tree down to ground level.
- On the "hemp" new shoots will begin to grow, which must immediately begin to grow up to stimulate the formation of the root system.
- As the shoots grow, continue to spud them, gradually increasing the height of the earth layer. As a result, it should reach 20 cm, but not exceed half the height of the shoot.
The following year, in the spring, separate the shoots from the hemp, carefully re-bobbing it, and plant it on the prepared place.
Propagation of cherries by cuttings

To root the cuttings, you need to properly prepare them
- In early June, cut young shoots that have hardened at the base and begin to blush. In length, they should be about 30 cm. The upper section is made above the kidney, the lower - under the kidney at a distance of 1.5 cm.
- Put the cut material in water, having previously removed the lower leaves. Soak cuttings for 3-5 hours.
- Prepare the site for planting. For this:
- Dig the soil and make beds on it.
- On the beds, dig a trench 20 cm deep.
- Pour drainage at the bottom of the trench (pebbles, fine gravel, coarse sand).
- Pour a layer of fertile soil on the drainage, mixing it with humus (3-4 kg / m2), ash (300 g / m2) and superphosphate (100 g / m2) Moisturize well.
- Plant the cuttings in the ground, digging them into the soil by 3 cm, at a distance of 10 cm from each other. Place the cuttings vertically.
- Cover the plantings with a film to protect them from the sun and provide seedlings with favorable conditions for survival.
- Water and air the bed as needed.
It takes about a month to root, after which you can remove the film. Water, weed and loosen the bed regularly. In the spring of next year, transplant seedlings to a permanent place.

The greenhouse creates favorable conditions for rooting to seedlings
If you prepared the cuttings in the fall, then until spring they must be stored in the refrigerator or cellar, placed in a moist substrate (sawdust, sand) and making sure that it does not dry out. If you store cuttings in the refrigerator, then place them in a plastic bag, if in the cellar, then stick them in the box with the substrate with the lower end.
Propagation of cherries with seeds
As a rule, grape cherry cuttings grown from seed are used for rootstock, as they usually do not inherit the properties of the mother plant.
Preparing seeds for planting
- Remove the seeds from the fruit and rinse thoroughly.
- Drain and dry the bones on a paper towel to prevent direct sunlight.
- Wrap dry bones first in a newspaper and then in a plastic bag; you can also use a plastic container with a lid. Remove the workpiece in a dark place (temperature should be around +20aboutC) until December.
- Then carry out the warm sanding procedure. To do this, take a container, lay a layer of sphagnum moss on the bottom (it can be replaced with dry sawdust) 3 cm thick and fill it with warm water. Soak the substrate for 8-10 hours, and then squeeze it to remove excess moisture.
- Put the cherry seeds in the substrate.

To conduct warm sanding, the bones must be put in a moistened substrate
- Close the container with a lid or cover it with a plastic bag, making several holes in them for ventilation. Store the workpiece in a dark place at room temperature for 3-5 days, changing the water daily.
- Stratify. To do this, take a container or plastic bag and fill it with a moistened mixture of peat moss and sand, taken in equal proportions. Moisturized sawdust or vermiculite is also suitable. Put the bones in the substrate and put the workpiece in the refrigerator, but not under the freezer. The bones should be stored this way for 3 months. Do not forget that the bones need to be checked periodically, drain stagnant water and moisten the substrate as necessary. If some bones become moldy or begin to rot, then discard them.
- Toward the end of February, start checking your bones more often. If you notice that the shell has cracked, then you need to immediately plant the seeds in the ground. If it is not possible to carry out this event, reduce the storage temperature to 0aboutC, but keep in mind that germinating seeds must be planted in pots no later than mid-March.

Planting seeds in pots and further care
- Prepare containers. It can be separate pots with a volume of 0.5 l or a common box. In depth of capacity should be not less than 30 cm.
- Fill the dishes with soil, and it is advisable to take the one in which the mother plant grew. Some gardeners also use river sand or sawdust. Moisten the substrate lightly with warm water.
- Plant one bone in the pot, deepening it by 2-2.5 cm. When planting in a common box, observe a distance of 20 cm.
- Cover the dishes with foil and place in a bright, but not hot place. The seeds take about a month to germinate, but if they cracked at the time of planting, the sprouts can appear in 20-25 days.

After sowing the seeds in the ground, they must be covered with a film
- After the shoots appear, remove the film. Watering is carried out sparingly and as necessary, because with excess moisture, the seeds can rot.
- When the shoots reach 20-30 cm in height, they can be planted on the prepared site in open ground.

As you can see, planting cherries is not a problem, and even beginner gardeners will cope with it. Careful and timely implementation of all instructions will certainly ensure the proper development of your plant, which means it will bring you a quality crop.